Review
Controls
The controls of this game are thorough and make Gabriel Knight 1 seem like a walk in the park. Read your manual properly to get into the knitty grit of it all.
Since this game dates back to the time not everybody had a mouse, there is a shortcut key for almost anything, so accidentally typing a letter may result in bringing up a screen you didn't want.
The game makes a difference between movement mode and interactive mode. Use movement mode to walk around in the area, and interactive mode to look at things and talk to people.You can switch between the two modes by pressing Spacebar.
In Movement Mode, you can move forward, backward and turn by moving your mouse in said direction. You can look up and down using the arrow keys, raise camera level withShift, lower camera level with Control, and run by holding the R down. You can't run if your camera movement is at maximum speed.
Important: the camera is you. Moving your camera in places where it shouldn't go, such as the lasernets in Ching's house, results in death.
In Interactive Mode, you can bring up any panel by clicking on it. You can use the yellow coloured command on the item your mouse points at in the game screen with a left click, and change commands with a right click. Click on the Inventory tab to bring up the inventory list in the top right field.
When you're talking to someone, remember you can save at any point. This is handy in cases like Ardo and the Broken Skull waitress, where a bad option kills you.
General hints
The game doesn't allow you to get stuck at any point: if you fail to jump on the cart to progress, you die. When you are stuck for a longer period of time, remember:
-Did you talk to every character about everything? Maybe there is a new topic or you missed something.
-Is there a new place you can go to?
-Did you thoroughly search every new place? There might be an object. Pixel hunts in this game are tough since items appear flat, so it's easy to overlook something.
-Is there a new fax in the machine? Is there a new item in the Blue Light Special Box?
Walkthrough
Day 1: Cuffing up Flemm
You start as Tex Murphy in your office, lonely, broke, and looking for a job. Let's take a good look-around in the office. Look at:
-the fax machine. It's broken down. Mental note: get a new fax machine.
-the photo of Sylvia on the desk
-the Crime Link computer. Also turn it on, although you don't have any data yet.
-Play the jukebox
-Get your gun
-Get your mail, both items
-Examine the three things you got in the mail
-Open the bottom left drawer of your desk, get the pen
-Open the bottom right drawer of your desk, get the stamp
-Combine the stamp and the pen with the credit card form
When you're done with all this, get on the street and talk to Chelsee Bando, the girl in the magazine stand.
Most options are great, but choose C and C to get her to tell you about the burglary at the nearby pawn shop. After that, you get the "Ask About" option. Talk to her
about all topics, but note especially what she says about the burglary: a man with green eyes and an anchor tattoo.
Now enter the pawn shop. Rook will talk about the crime regardless of your options, he'll explain the M.O. A young lady pawned a valuable bracelet for $8,000, then
the burglar robs the jewel the same night. Police are not willing to give it any attention, so get him to hire you. He'll take you to the alley.
In the alley, take a look around. Especially:
-Note the chocolate footprint on the floor. Size 14.
-Below the broken window, there's a shard of glass. Pick it up and examine it... red hair.
-Move the trash can that's just to the right of the steps, take the key you find there.
-Pick up the basketball
-Open the garbage container and look in
-Pick up and examine the radio by the garbage container to get batteries.
-Open the waste paper trash can
-Move the fire escape down and open the door it leads to.
-Look at the window in the same corner.
Leave the alley by moving a few planks from the fence to the street, for easy access to the alley in the future.
Go to the pizza store and talk to Francesca Lucido.
After that, look on the ground outside the Brew & Stew, pick up the newsletter. Read every article in it.
Enter the Brew & Stew, talk to Louie.
On the street, find a blue mail box. Look at it and post your credit card form.
At the other end of the street, there are a few places. Rusty the Clown's faux shop is closed, but look at it to open up the Rusty topic in the Conversation mode.
Visit the Golden Gate hotel, talk to Ardo. Save before going in at any rate, and stay friendly with him. He never has any information you need, but you can on two
occasions score a point if you get to ask him questions. Note he's a fan of Inspector Burns.
Press the Travel button. You can now go somewhere else: the police station.
Mac Malden is a bit of a tough nut to crack, but use the friendly rejoinder, fondly reminisce, and act shocked at ineptitude.He'll tell you something about the burglar: a male white norm with AB- blood.
Back at the street, the bum has gone home to his container in the alley. Talk to him twice. He isn't friendly, but note he's addicted to chocolate.
Visit Louie to get chocolate pie. Take that to the bum, and he'll tell you what he knows about the burglar: a big guy, 6'3 to 6'4, weighing 300 pounds.
Go back to your office. It's time to use the Crime Link Computer!
Enter Male, Caucasian, Norm, AB-, red hair, green eyes, anchor tattoo, height and weight, and there'll be only one match: Mick Flemm. Read his file and note:
-he hangs with Beek Nariz
-police wants him in relation to the disappearance of Rusty the Clown
Talk to Chelsee about these topics, Rusty and Beek. She'll tell you to go to the Colt tower, which is to the left of the Golden Gate hotel.
Go to Beek, be nice and give him the Plastic Surgery Coupon. Talk to him about the burglary, Mick Flemm and Rusty. Note he says Mick suffers from bozophobia: an
insane fear of clowns. He'll also tell you Mick operates from the Snow White Warehouse.
First, let's see if we can find any clues at Rusty's shop. To enter, you'll need the key. It's under the mat.
Have a good look around. You'll need to:
-Pick up the suction dart crossbow
-Pick up the toss ring below the plastic weapons
-Pick up the Inspector Burns mask behind the shelves
-Pick up the Rusty doll in one of the boxes
-Combine that doll with the batteries you found in the bum's radio
-Pick up the key to the employee's room
-Enter the employee's room
-Look in the barrel of acid. Oh dear...
-Pick up the suction dart on the wall
-Pick up the balloon in the sink
-In the store, look at the mouth of the clown wall figure on the left. He has a helium nozzle there.
-Use the balloon on the nozzle to make a balloon with helium
-Look at the Inspector Burns programme on TV
Now you can leave and never go back there. Enter the Snow White Warehouse.
Look around. Note the hook on the ceiling. Note the crate room partition. Open one of the crates and pick up the fireman suit.
Climb the scaffold and get the key you find there. Use this key to open a box on the left of the crate partition. Pull that lever and voila: the hook moves left
to right. Stop it again, climb up and attach the Rusty doll to the hook. Crawl behind the crates and pull the lever again.
When Mick runs out, pick up the bracelet and key he left behind. Use the key on the storage panel. Open it, get the strongbox. Open this strongbox with the alley key,
examine it and get the jade. Go home.
Day 2: Goose Eggs And Hamm
Pick up your credit card in the mail. Use it on the door to the Electronics Store to get in. You can talk to Hamm, but there's no points or need: you can also just use
your credit card on the Blue Light Special Box to open it, and take the fax with you. Take it home and you'll receive a fax immediately. Take it and examine it. Then
visit Countess Renier.
Talk to Chelsee, use "nudge nudge" reply and ask her about the statuette. Then visit Mac, give him kudos and ask him about Franco Franco. Then go to Rook and talk about jade. Fish the magazine out of the waste paper trash, examine it to get Franco's address. Go out and talk to him. Give him the jade, and ask about the Mysterious Artefact. Then go home, get the fax and read it. Go to Mac and ask about the Knickerbocker.
Visit Eddie, note the maker of the security system is Hamm. Go to the electronics shop and talk to him. Messing up is fun to hear all of Tex's excuses, but to progress, choose CCBA. Then open the Blue Light Special Box to get the laserblade. Then enter Eddie Ching's.
In the library, get the book on top of the book shelf. Examine it to get a key. Open the closet door on the left, get the fish food and the trap. Feed the fish and use
the ring toss ring on the water to fill it. Then open the door to the hallway. Shoot the crossbow, then toss the ring to remove the laser net. Open the door to your left. (Don't open the other one, you'll die.) You're now in Ching's study. There's a door to the right that leads outside, don't open it or you'll die. Do the following:
-look at the geigger
-find the geigger chow behind one of the obelisks
-combine chow with the trap
-use the trap on the geigger cage to get the animal
-pick up the fax on the floor near the centre table
-examine fax: note Ching's birthday is 10-14-12
-move the painting on the left wall to reveal a safe
-open the safe, use Ching's birthday for combination
-take out the security pass and the bidder's list
-examine the bidder's list
-in the back left, find and get the noose
-move the mirror on the wall near the noose
-use the book key on the slot behind the mirror
Now go back to the library and enter Ching's Secret Room. Here:
-Look at the statuette in situ
-Move one of the crates to the left of the entrance
-Take David's bandana from his loins
-Move the only movable painting on the wall to reveal the security card slot
-Use security card on security card slot
-Use the bandana on the dirty sign on the side of the box with Byzantine artefacts. You could pull the lever but it costs you points.
-Use capture noose on statuette
Now, return home.
Day 3: Colonel, Fran and Alley
Talk to everyone on your avenue about your mugging. Getting to talk to Ardo is troublesome: if he opens with "Hey Mr Detective Guy, how's it going?" you won't get there.
If he is watching TV he won't talk to you either. Come back again and use his fondness of Inspector Burns to get him to answer questions. There's one point in it.
Francesca is the one who knows something about the mugging, but you have to help her first: getting some evidence that Sal is cheating. She'll give you a code.
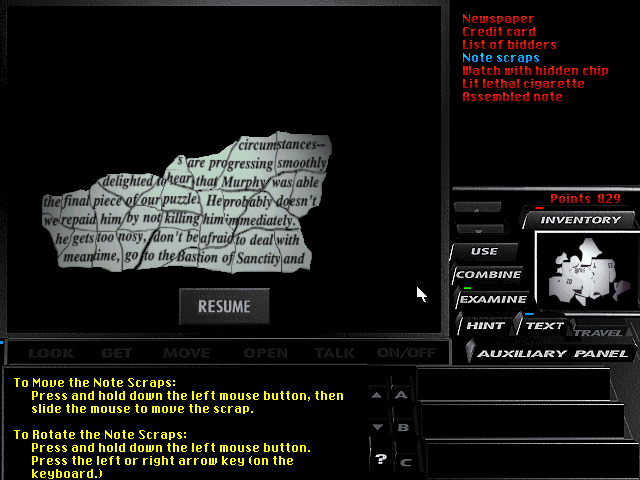
Talk to Louie about it all, particularly about Sal. He'll tell you about a note he threw in the garbage outside. Take it out and puzzle it together. Then combine it with Francesca's note. Decipher that code: "We have confirmed your appointment with Chastity..." Note the password is SILICON.
Talk to Ardo. He'll tell you to go out. Now what?
Luckily, you have your Inspector Burns mask and fireman suit! Combine these two in your inventory! If you have your helium balloon you can visit Ardo without fear! Choose BB for conversation options, then you can go to the suite.
Enter SILICON and there you are!
The main room doesn't have much: gold foil on the table to the left to take, and two paintings to move: the middle of the three over the left table with gold foil reveals a Twistee game, and the painting to the right of the bedroom entree reveals a list of Sal's conquests.
Enter the bedroom. Open and inspect all drawers of the desk, look at the camera and Gideon's bible. Note there is a locked drawer. Open the closet and get the glass.
Open the table to the left of the bed and look at the Playbub magazines.
Enter the Music Room. Play piano and pick up the Room Deodorizer.
Enter the Bathroom. Move the moldy towel on the floor and look at the grate below. Look at the vase to the right of the door: there's a cork in it. To get the cork with wire, fill the champagne glass with water and use that on the vase. Then, examine it to get something to pick the bedroom drawer lock with.
Pick said lock, open the drawer and get the shoelace. Combine shoelace and magnet to get Magnet On A String. Use this on the grate in the bathroom to get the screwdriver.
Use the screwdriver on the grate to get the film.
Now, how to develop that? Fortunately there's an Instant Film Developer available at the Electronics Shop in the Blue Light Special Box. Get it, develop and examine the photos, then take them to Francesca. She'll tell you about Pug.
Talk to Beek Nariz about Pug. When you're done talking to him, you're taken to him automatically. Pick any conversation and after you're done with him, visit the Colonel.
Day 4: A Code, A Tode and A Cigarette Load
Go to the Countess room. Find the obituaries lying about on the floor, move them and inspect the ashtray. Look at the eagle in the chandelier, use the gold foil on him
and pick up the cigarette case he dropped near the table. Examine the case to get a cigarette. There is a watch on the mantle piece. Take it and examine it. Look in the trash can and pick up the shredded note. There are no points in completing this note.
Go to the Colonel's house. Open the drawers in his desk, and take and examine the postcard and envelope. Move the vase on the bottom right of the shelves to reveal the
disk. Take it. Turn on the computer, use the disk and read. Note the file cabinet is locked.
Visit Melahn Tode. You will eventually have to offer her something: give her the postcard. She'll talk now. Ask her about the Colonel, then ask her about the key. Use
the key on the file cabinet at the Colonel's.
Dang. The files are in code. Now what?
Fortunately there's something new: the mail has arrived! Move the magazines to get the UPX receipt. Go back to Melahn Tode and ask her about that. Look at the papers
she'll give you.
The safe in the Colonel's office is right behind the naval painting near the file cabinet. Move it, and use the combination 5-7-1 to open it. Get the book and use it on the files. Read them.
There's now a new address: the Roadside Motel. After the show, go to your office and save your game. Yes, it's time for:
THE DREADED GRS

Before entering, make sure your walking speed is set to High. This means you don't have to hold R to try to run out the Eyeball Of Doom.
Here is a map of the GRS section. You begin at point B, the exit. The eyeball travels from point C to point B, then takes the path past the Tucker and Conference room to point A. He'll enter both of these rooms for a few seconds, then comes out to proceed with his path. After he reaches point A, he will travel to point B, then take the path to the R&D and Schanzee rooms. There is no relation between the location of the eye when you're in the hallway, and the location of the eye when he just swept a room.
Security sweep starts when you've been in a room 100 seconds, not when the eyeball passes it. You can dodge it in every room, but you can also run outside when you hear the dreaded message.
There is no reason to play this game for max points, but if you are, remember to survive the Security Sweep in every room, even if that means waiting for the eyeball.
NNBL stands for Not Needed Before Lock-up. If the eyeball drives you mad, you can choose to wait with doing that until you've locked in the security probe.
After Tex stops talking, you have three seconds to press Space and run to your left, enter the second room, Research and Development.
R&D:
-HIDE crouched (press Ctrl) between the wall and the side of Paul Dubois desk.
-Pick up the spanner on the floor.
-Pick up the television kit on the middle desk on the right hand side if you enter.
-NNBL Pick up the pennant (flag) on the left wall.
-NNBL Examine pennant to get Paul Dubois computer card.
-NNBL Turn on Paul's computer and use the card on it, read all files and view the Moonchild animation.
After you're done here, you can keep your cool and go to the door next to this one: Eva Schanzee's office.
SCHANZEE OFFICE:
NOTE: You can get trapped in the inner cubicle if the security sweep starts while you're in there. To save yourself a heart attack, wait behind the desk for the probe to come by after you've opened the door.
-HIDE crouched behind Eva's desk.
-Look at the inner cubicle, which is locked.
-Use the hex (inbus) spanner on the small panel by the side of the door.
-Use the geigger on the open panel
-Enter the cubicle, open the left hand drawers on the right desk, pick up the laserdisk and pass card
-NNBL Pick up the disk on the left hand desk
-NNBL Read the memo on left hand desk
-NNBL Pick up the computer access card stuck under Eva's desk
-NNBL Use the computer access card and minidisk to start up the computer, watch the film
-NNBL Look safe
-NNBL Open safe, using the combination in Tucker's office: 142235
-NNBL Pick up cigarette viral powder
After visiting Schanzee, it's useful to check the map. To prevent bumping into the probe at an intersection, walk to point A, then point B, then to the conference room.
CONFERENCE ROOM:
-HIDE crouched behind the desk in the corner, close behind.
-Open bottom left desk drawer to get the laserdisk player.
-NNBL Open the top left desk drawer, look at the Playbub magazines
-NNBL Pick up the key on the wall with the door.
-NNBL Look at the locked cabinet door
-NNBL Open locked cabinet door
-NNBL Turn on VCR
-NNBL Put VHS into VCR
-NNBL Read the memos on the conference table
-NNBL Turn on the beamer and watch the video
When you've picked up the Laserdisk materials, head to Tucker's office. Open it with the passkey.
HIDE behind the plants. Crouched here, combine the laserdisk equipment with TV and laserdisk to make A/V Equipment. Examine this, and note "Hello, I'm Markus Tucker."
After you've made this, it is time for the lock-up. Place yourself in a comfortable position so you are as close to the safe door as possible, but can still see the On/Off switch. Flip it. Then use the A/V Equipment on the lock. When it says you have 30 seconds, rush into the safe, pick up the Buddha statue and the VHS on the desk, turn to the trash can and pick up the shredded note, leave and hide behind the plants. When the probe flies into the safe, lock it in by flipping the on-off
switch again. You did it!!
Also,look at the security lock, and open both of the desk drawers. Note the safe number, and pick up the match.
Now you have anything you need, enjoy the landscape.
Examine the Buddha statue to find the Winter Chip.
Examine the Winter Chip, combine it with the watch.
Examine the Chip With Watch.
Combine the cigarette with the viral powder, and then combine that with the match. Don't worry, it'll stay lit forever.
After the GRS, you can go home.
Day 5: Beating The Odds: A Chameleon To One
Visit the Bastion of Sanctity.
Look at the Chameleon, note he's smoking. Take the passage to the left, pick up the bungee cord, the gem in the eye of the Uncle Morty art, and look at the vase above it. Walk around the room to the other side, pick up the vee clamp. Combine clamp with bungee cord to make a catapult. Combine catapult with gemstone, and use this to
smash the vase. After that, move around to the other side, enter the main room, and use the lethal cigarette on the ash tray. Watch the video.
Look at Alaynah in the laser beam. Look at the nearby shield. Move it, then flip the switch.
After talking to her (you can pick any option), visit the Broken Skull. Save your game: the waitress is very deadly and will shoot if you choose the wrong option.
Order a manly drink, make a cash joke and offer a bribe. Give her the hundred dollar bill (that magically appears in your inventory at this point) and ask for a ride to the Moonchild. When she asks for the token, stall. She'll let you go.
Visit Alaynah, explore the GRS conversation topics and ask her about the token. Now, who could have a silver dollar?
Visit Rook and ask him about the silver dollar.
Now is the last opportunity to talk to any character about anything. When you're done, visit the Broken Skull. Give her the token, and you'll get to meet Ferrell Pus.
Your conversation with Ferrell is not as deadly, and the shell game always asks for the same options: farthest ball, centre ball, closest ball, closest ball. You're now invited to go have a drink, and ask for the house special. You could stall when asking for a drink, but don't ask any questions about the Purification or the waitress shoots you. You'll drink, and day 6 starts.
Day 6: Mooning The Cult
You start in the Arboretum with a pixel hunt. Look ahead after the TV disappears: you can see a loose stone in the wall. Pick it up. Look at the leaves. Turn around: look at the smoke detector over the door. You can't just walk out the Arboretum, the guard will kill you. No, you'll have to set them up, with the leaves and the smoke detector.
In the path to the left side of the exit door (when facing it), you can find the rake between the plants. Look at the window, to the right side on the edge, you can find some flint. Open the closet door, take out the lighter fluid.. Combine the flint and stone in your inventory to make Sparks, use Rake, then Lighter Fluid, then Sparks on the leaves to set fire to them and get out.
Now you're out you can walk left at the T, which goes to the Observatory. You don't really need to go there yet, so turn right. Explore a little: if you find the Emergency Doors, all you need to do is look at them to get a point. If you find the Residential Decks, don't open the door, but pick up the pipe in front of it. If you find the Stasis room, enter.
The Resurrection puzzle is an annoying trial and error, where making two bad moves in a row means you're dead. Dying here does mean you're teleported back automatically without losing any points.
Solution:
-Turn It On
-Move Temperature slider to 56
-Move Oxygen slider to 12
-Press Adrenaline button
-Press Shock button
-Move Temperature slider to 85
-Press Sodium Pentthol button
-Press Adrenaline button
-Move Oxygen Slider to 14
-Move Temperature Slider up all the way
-Move Oxygen up all the way
-Press Adrenaline button
-Press Sodium Bicarbonate button
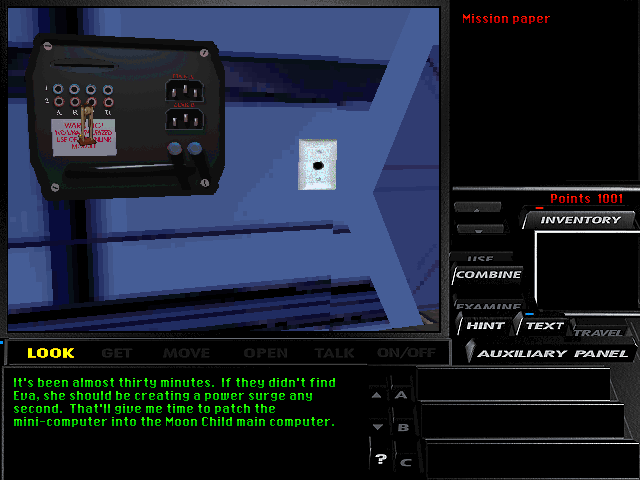
Watch video. Then examine the mission paper.
Enter the observatory. Pick up the cocktail glass and examine it to get the flex straw. Move the plant to the right of the window to reveal the floor panel. Pry it open with the pipe and take out a wire. Use Eva's key on the wall cabinet. Move the game and take the computer. Combine computer, wire and chip in your inventory.
Look at the jack on the wall. Use the straw on it to reveal the computer. Use the Winter Chip Hacking Computer Of Doom on the board computer, lay back and watch the ending.

UAKM Point List
Day 1
look fax machine 2
look crime link computer 2
use crime link computer 2
look Sylvia picture 8
get gun 6
get sales flyer plus application form 2
get gift certificate 1
examine certificate 1
examine sales flyer 4
examine credit card application 1
use phonograph 2
open pen drawer 1
take pen 1
open stamp drawer 1
take stamp 1
fill out and stamp application 2
get on street 1
look Rusty shop 1
look mail box 1
talk to Chelsee 1
hear of Rook's burglary 1
talk Chelsee burglary 1
post application 7
enter Rook's 4
get in alley 1
open painted door 6
get basketball 6
look shoe outline 1
move trash can 1
take alley key 1
take glass 1
examine glass 1
open paper trash 1
get radio 1
examine radio 1
look opened dumpster 1
move to street through alley fence 1
pick up bay city mirror 1
read of burglary 5
talk to Ardo, get him to answer questions 1
talk to Mac 1
get leads from Mac 1
Enter alley with bum 2
Talk to bum 4
learn chocolate need 2
get chocolate pie 1
give pie to bum 6
talk bum burglary 1
get suspect info 16
talk Chelsee Beek 2
Tak to Beek 5
Give Beek gift certificate 4
Talk Beek Rusty 1
Talk Beek Mick Flemm 2
Move Rusty doormat 1
Get Rusty key 1
unlock door 3
open door 1
enter Rusty 1
get employee only key 1
get mask 1
get crossbow 1
get ring 1
look nozzle 1
watch Burns show 7
get Rusty doll 1
combine batteries doll 1
look employees only door 1
unlock employees only door 3
open employees only door 1
find Rusty 8
take balloon 1
take dart 1
combine dart crossbow 1
use balloon nozzle 2
enter warehouse 7
open box 1
get fireman outfit 1
combine suit and mask 1
get key 1
unlock switch cabinet 1
hang doll 1
scare Mick 10
get bracelet 1
get key 1
unlock cabinet 2
get box 1
combine box alley key 1
examine box/ get jade 2
total 203 points
Day 2
get credit card 2
enter electronics shop 4
get fax machine 5
receive fax 1
examine fax 1
talk to countess 2
talk to Chelsee: nudge nudge 1
talk Chelsee statuette 2
give kudos to Mac 1
talk Mac Franco 1
Talk Rook jade 1
get magazine 1
examine magazine 1
enter Alhambra 12
give jade 7
ask Franco about item 10
get Franco fax 1
examine fax 1
talk Mac Knickerbocker 8
visit Eddie 1
talk to Hamm 1
get details: CCBA: 1
get rid of blue light 1
get laserblade 1
get into Knickerbocker 10
open aquarium 1
open closet 1
take cage 1
get book 1
examine book 1
fill ring 1
feed fish 6
look lasernets 1
use crossbow 1
use ring 11
move safe painting 1
get geigger chow 1
combine chow and trap 1
get geigger 8
get noose 1
move mirror 1
use key on mirror slot 1
get fax 1
open safe 3
get document 1
get security card 1
examine list of bidders 4
enter secret room 9
look protected statue 1
move crate 1
move painting 1
use card 1
use bandana on sign 6 (flip switch loses 20)
use noose 9
points: 358
Day 3
talk to Ardo 1
talk to Fran 1
get note from Fran 1
talk to Louie 1
Talk Louie Sal 1
open trashcan 2
get note scraps 2
solve note 1
combine note with code 1
solve code 1
enter suite 25
look list 4
look Twistee game 4
get gold foil 1
look locked drawer 1
look camera 4
look sexy magazine 4
get magnet 1
pay piano 6
look vase 1
open closet 1
get glass 1
move towel 1
look grate 2
fill glass 1
get cork 11
examine cork 1
pick drawer lock 6
get shoelace 1
combine magnet shoelace 1
use magnet on grate 1
use screwdriver 1
get film 9
use credit card on laser box 1
get film developing kit 1
combine film and kit 6
examine photos 4
give photos 2
talk Fran mugging 2
talk Beek 1
talk Beek Pug 4
talk to Pug 1
finish talking to Pug 1
go to Colonel 21
Day 4
visit Countess 1
wait until Tex stops talking 4
look eagle 2
look ashtray 6
use foil 1
take cigarette case 6
examine cigarette case 1
take scraps 2
get watch 2
examine watch 1
visit colonel 2
move vase 1
get disk 1
move safe painting 1
move photo frame 1
look photo 2
open envelope drawer 1
get envelope 1
open postcard drawer 1
get postcard 1
examine postcard 1
examine envelope 4
turn PC on, use disk, read files 1
visit cop 1
visit Melahn Tode 3
offer postcard 6
talk Melahn colonel 1
Talk Melahn key 1
unlock cabinet 1
get file 2
move mail 1
get receipt 1
examine receipt 1
visit Melahn Tode 1
talk Melahn receipt 1
open safe 6
get book 1
combine book with files 10
read file 16
visit Alaynah 4
enter GRS 1
get spanner 1
get flag 1
examine flag 1
turn on computer 1
use pass, examine files 22
hide successfully from probe in R&D 1
.. in Schanzee office 1
in conference room 1
in tucker office 1
look door 1
use hex spanner 1
use geigger 12
get minidisk 1
read memo 9
get laserdisk 1
get Schanzee PC card 1
turn on Schanzee PC 1
use Schanzee card on PC 1
use minidisk 1
watch Schanzee 37
get TV 1
get laser player 1
use passkey 7
enter room 3
make laserdisk loaded and combine with TV 2
look safe lock 1
open safe 14
get statue 1
get VCR 1
get shreds 1
lock in security probe 20
open match drawer 1
take match 1
open tape drawer
look tape 1
look safe 1
open safe 2
take powder 1
examine buddha 1
take key confer room 1
unlock cabinet doors 2
look cabinet 1
turn on VCR 2
watch video 40
look Playbub magazine 4
points 839
Day 5
Enter Bastion 1
look at Chameleon 1
get bungee cord 1
look vase 1
get gem 1
get clamp 1
combine clamp and bungee cord 1
combine gem and catapult 1
use catapult on vase 10
swap cigarette 1
look Alaynah 1
move shield 1
flip switch and revive Alaynah 5
finish conversation with Alaynah 1
Visit Broken Skull 2
get to offer money 1
offer money 1
get to token question 2
leave Broken Skull 1
go to Roadside Motel 1
talk to Alayna about token 1
go to Rook 1
get silver dollar 6
go back to Broken Skull 1
get to offer 1
give dollar 9
get to Ferrel Pus 1
find part of Moonchild ticket: 1 per section (4 total)
get back to barkeep 6
points 904
Day 6
examine watch 1
look leaves 1
look Smoke Buster 1
get stone 1
get rake 1
get flint 1
open closet 1
get lighter fluid 1
combine stone and flint 1
use rake on leaves 1
use lighter fluid on leaves 1
use sparks on leaves 11
look emergency door sign 1
get pipe 1
open stasis room 3
wake Eva 27
examine paper 3
unlock panel 2
move game 1
get computer 6
get glass 1
examine glass 1
move plant 2
use pipe on floor panel 1
get wire 7
look wall jack 1
use straw on jack 5
combine PC with wire and Winter Chip 1
hack PC 10
Under A Killing Moon Inventory Item List
Credit Card Application Found in the mail at Tex's office. Changes into Stamped or Filled OUt form after using Stamp or Pen
Filled Out Application Gotten from Application + Pen combination. Becomes Ready To Mail Application after Stamp is combined.
Stamped Application Gotten from Application + Stamp combination. Becomes Ready To Mail Application after Pen is combined.
Ready To Mail Application Credit Card Application + Pen + Stamp result. Needs to be mailed on day 1.
Pen Found in Tex's Office Drawer. Used on Credit Card Application.
Stamp Found in ex's Office Drawer. Used on Credit Card Application.
Sales Flyer Found in Tex's mail.
Surgery Coupon Found in Tex's mail. Given to Beek Nariz.
Alley Key Key found under the trash can in the alley. Used to open the stronghold box.
Glass Shard Found in alley under the window. Needed to find the red hair clue. Disappears after finding Flemm.
Radio Found in alley near dumpster. Contains batteries.
Batteries Gotten after examining radio. Used in Rusty doll.
Newsletter Found on street outside Brew & Stew. After reading it opens up the Crusade in dialogue box and the Police travel location.
Chocolate pie Gotten from Louie after talking to him about chocolate. Given to bum.
Rusty door key Found under Rusty's door mat. Used to open door to Rusty's shop.
Employee Door Key Found in Rusty's shop. Used on Rusty Employee Only door
Crossbow Found in Rusty's shop. Combined with suction dart to create Loaded Crossbow.
Burns Mask Found in Rusty's shop. Combined with Fire Suit to create Burns Costume.
Rusty Doll Found in Rusty's shop. Combined with batteries to make Live Rusty Doll.
Live Rusty Doll Combination of Rusty Doll + batteries. Hung on hook in Flemm's hide-out.
Ring Toss Ring Found in Rusty's shop. Used on aquarium in Eddie Ching's apartment to make Filled Ring
Suction Dart Found in Rusty's Employees Only. Combined with crossbow to make Loaded Crossbow.
Loaded Crossbow Combination of Crossbow + Suction Dart. Used in Eddie Ching's hallway to turn off the lasernet.
Balloon Found in Rusty's Employees Only. Used on Helium Nozzle to make Helium Filled Balloon
Helium Filled Balloon Gotten when balloon is used on helium nozzle. Used to get past Ardo in combination with the Burns costume.
Warehouse Key Found on top of the scaffolding of the Snow White warehouse. Used to open the Hook Rail Lever Box.
Fireman Suit Found in crate in Snow White Warehouse. Combines with Burns mask to make Burns costume.
Burns Costume Combination of Fireman suit + Burns mask. Used to get past Ardo on day 3.
Bracelet Found on table in Snow White Warehouse. Disappears at start of day 2, given to Rook.
Box Key Found on table in Snow White Warehouse. Used to unlock the box in the warehouse that contains the stronghold.
Stronghold Found in box in Snow White Warehouse. Combines with Alley Key into Open Stronghold.
Open Stronghold Combination stronghold + alley key. Reveals jade after examination.
Jade Found in open stronghold. Given to Franco Franco.
Credit Card Found in the mail on day 2. Used to open the Electronics Shop door and the Blue Light Special Box therein.
Fax Machine Gotten from Blue Light Special Box. Used in Office.
Fax from Countess Received on day 2, disappears after examining
Jewellery Magazine Picked out of trash on day 2, disappears after examining
Franco Franco Fax Received after talking to Franco Franco. Disappears after examining.
Laserblade Gotten from Blue Light Special Box. Used to enter Eddie Ching's.
Trap Found in Ching's library closet. Combined with chow to make Geigger Trap
Fish Food Found in Ching's library closet. Used on Aquarium.
Filled Ring Toss Ring Gotten when ring toss ring is used on aquarium water. Used to de-activate lasernet.
Book Found on bookshelf. Contains key.
Ching Key Found in book. Used to open secret room.
Chow Found behind obelisk in Ching study. Combined with trap to make Geigger Trap
Geigger Trap Combination of trap + chow. Used to catch Geigger.
Geigger Gotten when geigger trap is used on geigger cage. Used to enter supervisor's office at GRS
Capture noose Found in Ching's study. Used on the bird safety cage to get the statuette.
Birthday fax Found on floor of Ching's study. Contains safe combination key. Disappears after safe is opened.
List of Bidders Found in Ching safe.
Security Pass Found in Ching safe. Used to remove blue lasers in secret room.
Bandana Found in Secret Room. Used to wipe the dirt of the Do Not Pull This Lever sign.
Statuette Found in Secret Room. Is stolen at the end of day 2.
Francesca's Note Gotten from Francesca on day 3. Combined with Repaired Message to get Coded Message
Torn Note Found in Louie's trash. Puzzled by the player into Repaired Message.
Repaired Message Achieved from Torn Note. Combined with Francesca's Note to get Coded Message.
Coded Message Combination of repaired message + fixed note. Decoded by the player.
Gold Foil Found in the hotel suite. Used on eagle on day 4.
Magnet Found in music room. Combined with shoelace to make Magnet on a String.
Glass Found in bedroom. Used on bath to make Filled Glass.
Filled glass Gotten when glass is used on bath. Used on vase to get cork.
Cork Gotten from vase in bathroom. Gives Wire after examining.
Wire Gotten from cork. Used to pick locked drawer.
Shoelace Found in locked bedroom drawer. Combined with magnet to make magnet on a string.
Magnet on a string Combination of shoelace + magnet. Used to get screwdriver in grate in bathroom.
Screwdriver Gotten from grate. Used on grate.
Film Found in grate. Combined with Developing Kit to make incriminating photos.
Developing kit Found in Blue Light Special Box. Combined with Film to make incriminating photos.
Incriminating photos Combination of developing kit + film. Given to Francesca.
Cigarette case Gotten from the eagle after using gold foil. Contains cigarette.
Cigarette Gotten from cigarette case. Combined with Viral Powder to make Lethal Cigarette.
Note Scraps found in Countess trashcan. Can be reconstructed but there's no message you've done so.
Watch Found in Countess apartment. Combined with Winter Chip to make Watch With Winter Chip.
Emergency Disk Found on vase in Colonel's room. Used on computer in the same room.
Postcard Found in Colonel's desk drawer. Given to Melahn Tode.
Envelope Found in Colonels desk drawer. Disappears after examining.
Key Gotten from Melahn Tode. Used on Colonel's file cabinet.
Encoded File Found in Colonel's file cabinet. Combines with Code Book to Decoded Files.
UHX Receipt Found in Colonel's mail. Disappears after examining.
Number Paper Gotten from Melahn Tode. Disappears after safe is opened.
Code Book Found in Colonel's safe. Combines with encoded files to make decoded files.
Decoded files Combination of Encoded Files + Code Book.
Hex spanner Found on floor R&D Office. Used to open vent of the protected supervisor area in Schanzee Office.
Pennant Found in R&D office. Hides Dubois computer access card.
Television Found in R&D office. Combines with laserdisk player to make A/V Equipment.
Minidisk Found on desk in supervisor office. Used in Eva's computer.
Eva computer card Found below Eva's desk. Used to access Eva's computer.
Laserdisk Found in secured desk drawer. Used on laserdisk player to make loaded laserdisk.
Passcard Found in secured desk drawer. Used to open Tucker's office door.
Laserdisk player Found in conference desk drawer. Combined with laserdisk and TV to make AV Equipment.
AV Equipment Combination of TV, Laserdisk Player and Laserdisk to access Tucker's safe.
Buddha statue Found in Tucker's safe. Contains Winter Chip.
Winter Chip Found in Buddha statue. Combines with watch into Watch with Winter Chip.
Watch with Winter Chip Combination of Watch + Winter Chip. Changes into Winter Chip after resurrecting Eva on day 6.
VHS Found in Tucker safe. Used on VCR in conference room.
Shredded Note Found in Tucker's safe. Unscrambled by player into Un-Shredded Note
Un-Shredded Note Achieved from Shredded Note.
Match Found in Tucker's drawer. Combined with lethal cigarette to make lit legal cigarette.
Viral Powder Found in safe. Combines with cigarette to Lethal Cigarette.
Conference Room Key Found in Conference Room, used to unlock the VCR cabinet
Lethal Cigarette Combination of Cigarette and Viral Powder. Combines with match to make Lit Lethal Cigarette.
Lit Lethal Cigarette Combination of Match and Lethal Cigarette. Used on the Chameleon's ashtray.
Bungee Cord found in Bastion. Combines with Vee-clamp to make catapult.
Vee clamp found in Bastion. Combines with bungee cord to make catapult.
Catapult combination of bungee cord and vee clamp. Combines with Gem to make Loaded Catapult.
Gem Found in bastion. Combines with catapult to make Loaded Catapult.
Loaded Catapult Combination of Gem and Catapult. Used on vase in Bastion.
Hundred dollar note Mysteriously appears in your inventory when you offer a bribe to the waitress. Given to her instantly.
Susan B. Anthony dollar Gotten from Rook, given to waitress.
Stone Found in arboretum. Combined with flint to make sparks.
Rake Found in arboretum. Used on leaves.
Flint Found in arboretum. Combined with stone to make sparks.
Lighter fluid Found in arboretum closet. Used on leaves.
Sparks Combination of flint and stone. Used on leaves.
Pipe found in Moonchild hallway. Used on observatory floor panel.
Eva's key Gotten from Eva after resurrecting her. Used to unlock cupboard on observatory.
Mission paper Gotten from Eva after resurrecting her.
Winter Chip automatically gets out of the watch after resurrecting Eva. Combined with computer and wire to make Hacking Computer of Doom.
Cocktail glass Found in observatory. Contains flex straw.
Flex straw Found in cocktail glass. Used to open computer panel.
Computer wire Found in floor panel in observatory. Combined with Winter Chip and Computer to make Hacking Computer Of Doom.
Computer Found in Observatory locked box. Combined with Winter Chip and wire to make Hacking Computer of Doom.
Hacking Computer Of Doom Combination of wire + computer + Winter Chip. Used on main computer to end the game.
Cast list
Great P.I. Of The universe James Earl Jones. Gets to read the Poe lines and mocks you when you die.
Colonel Brian Keith. Intro dude who gets stabbed by the chameleon. He taught you everything you know about investigating.
Chameleon Russell Means. Native American shaman who has the gift of morphing into other people beyond recognition.
Bar lady Margot Kidder. Gun-happy waitress who will kill you in the blink of an eye.
Tex Murphy Chris Jones. Protagonist. Smart, cynical, suave P.I. and dance instructor.
Lowell Percival Michail Bailey. Lead villain, establisher and financer of the Cult.
Eva Schanzee Mindy Lawson. Agent for CAPRICORN who is captured and kept in stasis on the Moonchild.
Alaynah Moore Rebecca Clay. Young girl who was secretary under Marcus Tucker until she got death threats.
Countess Renier Monique Lanier. The countess tells Tex to find the bird. Really Chameleon in disguise.
Mac Malden Kevin L. Jones. Disgruntled cop who gives leads on Franco Franco, Knickerbocker, and Flemm.
Eddie Ching Sandy Jensen. Hard-time criminal who owns San Francisco and lots of expensive art.
Rook Garner Doug Vandegrift. Owner of the pawn shop. Gives first case, jade info, and a silver dollar.
Louie Lamintz Randall Edwards. Friendly bar owner who gives you chocolate and info on Sal.
Chelsee Bando Suzanne Barnes. Lovely newspaper seller who gives info on the burglary, Beek and Franco Franco.
Francesca Lucido Jeri Christian. Runs the pizza joint. Gives you a cheater case.
Sal Lucido Doug Vandegrift. Appears only in the dirty photos you develop.
Ardo Newpop Aaron Conners. Giant and strong, mentally challenged and easily agitated. Obstacle to get into the hotel on day 3.
Clint the Bum Steve Barnes. Gets cross, but turns friendly when you satisfy his chocolate addiction.
Beek Nariz Doug Vandegrift. Mutant with elephant nose who is a friendly and valuable underworld contact. He gives info on Mick and Pug.
Hamm Underwood Brian Ferguson. Owner of electronics shop who also installs security systems.
Franco Franco Willie Walker. Underworld dealer of valuables. Trades info on the artefact for jade.
Melahn Tode Shannon Engemann. Airheaded lady who sleeps with the Colonel. Gives key and safe code.
Ferrel Pus Unhygienic fellow who takes people to the Moonchild. Sets you up for the shell game.
Pug Richard Haslam. Unhygienic fellow who mugs you and steals your wallet.
Sylvia Linski Kris Mickler. Hot-blooded ex-wife.
Rudy George Manousakis. Upholstery guy.
Marcus Tucker Mark McArthur. "Hello, I'm Marcus Tucker. Hello, I'm Marcus Tucker. Hello, I'm Marcus Tucker."
Paul Dubois Mark Hulka. Is seen when he's killed in the VHS film.
Security Guard Travis Driscoll. I assume he's the one who steps on the rake, but that might also be one of the technicians.
Moonchild Technician #1 Nathan Larsen. Praying man.
Moonchild Technician #2 Aaron Conners. "This place is going up like a Roman candle on the 4th of July".
Eddie Ching Thug #1 Dave Pherson
Eddie Ching Thug #2 Wayne Braithwaite
Mick Flemm Jay Richards
Monks Brandon Wright
Captain Wallaby Les Oswald
On Ardo's TV.
Delores Lightbody John Berven
Tex Murphy Stunt Double Mark Hulka.
Fun
Under A Killing Moon caters for most of its own "fun": sections like the Gun Pickup, Franco Spinoza and Cheating Sylvia are fun bits that aren't easily overlooked.
It's also enjoyable to save a game during dialogue to discover many of the paths. In some cases it's a bit of a waste of time, but personal highlights are:
-Tex admits he does a monster twirling routine to Franco Franco
-The Franco Franco begging for two questions after you've given him the jade. Kills you, but hey!
-The scenes with Margot Kidder, the waitress. She's pretty funny.
-The talking to Eddie Ching, whether being rude to her or displaying your pathetic grovelling.
-Show your rude personal opinion to Ardo Newpop.
There are a lot of paintings, and since most pictures are a little vague I'm not going to do another Mass Painting Search GK3 Style again, but have a good look at them anyway. Some are quite funny.
March To Die!
You will probably be sent more times to James Earl Jones than is entertaining, particularly during the GRS section. Still, for a good "have a nice death hunt"...
-The manual implies Ardo can be deadly but I haven't found any lethal discussion paths with him yet.
-True deadly situations don't occur until Day 2: for instance, ask Franco Franco the wrong question after giving him the jade.
-Walk into the lasernets when you are at Eddie Ching's.
-Open either one of the wrong doors at Eddie's.
-Get caught in the hallway by the Security Probe. You've probably seen this one already.
-Get caught in any of the rooms by the Security Probe. You've probably seen this one too.
-Walk into the Chameleon's main room while he is smoking there.
-Use the wrong commentary with the waitress: hint towards your being a P.I., ask for more information on the purification, walk away when you should give her money, return to her without the token, or flirting with her too many times.
-Getting killed during Ferrelette.
-Opening the Arboretum exit.
-Opening the Residential Deck Door.
-Failing to resurrect Eva. The game implies there are multiple messages for this, but I only found the first one.
Bloopers
True bloopers aren't easily found in this game, most have been cut out. Except for Brian Keith's slip of the tongue where he says Twister instead of Twistee.
There are some illogical deaths, which I consider disturbing. How do you die after giving Franco the wrong answer, for instance? How are you killed if you failed to resurrect Schanzee?
There are a few mean programming errors. For instance, after you picked up the note scraps and spent an hour assembling them, you don't get to hear you did it well, or whatever.
By talking to Mac about Franco Franco after you've met the elusive art dealer, you can open up the jade topic again and again, and get rid of it by going to Rook again and again. It may explain my recent walkthrough score of 1001 points, while 1000 is the maximum.
Some of the game's unanswered questions: why would anyone leave a camera in an unlocked drawer, and a shoelace in a locked drawer? Why put a trash can in a safe? If the chrystal statuette is worthless except to the Cult members, why not grab a large sledgehammer and get rid of it?
Review
I first bought Under A Killing Moon after reading a little about it on a Phantasmagoria page, even before I had ever heard of Gabriel Knight, possibly even before I'd played Shivers. I attempted to install it on my Win 98 dino, but alas, to no avail. I couldn't get it to work.
It wasn't until a few weeks ago, some three years after I bought it, that I finally got to play with Tex Murphy. (Thank you Collector!)
Under A Killing Moon ranks third in the best live action games I have ever played: it's funny and has pretty great puzzles! Favourite puzzles are the note scrambling (I love that), the cork puzzle in the suite bathroom, and the Rusty key under the mat. The abundant artwork and many voice-over commentaries really colour the environment. The music is often a pleasant background score that sets a good mood and isn't intrusive, there are many amusing side scenes, the storyline is good, the overall graphics are nice... It's sweet to include a few savegames as well.
Gripes with this game, besides the difficulty getting it to run, are:
-I'm getting a bit seasick from the 3D walking, particularly during search quests (I am looking at you, Arboretum!) and while running about the GRS.
-Search quest items are often hard to see and don't appear in some camera positions.
-The GRS section gave me near heart attacks and I used the savegames to skip that bit. Eventually I overcame my fears and managed to get enough info for this guide.
-Acting is always an issue in live action games. Although Access spent a large sum of money to get Russell Means, he really should have gone back to school. Other cringeworthy performances were found in Sylvia (although the beta-tester playing Rudy saved the scene), Alaynah Moore ("I'm scared, Tex"), Eddie Ching ("It's gone? You imbecile!")... Possibly Francesca Lucido too, although Silvio from Voyeur II may have ruined any Italian stereotype for me.
In short, Under A Killing Moon is a highly enjoyable title that was definitely worth the effort!
BACK TO TEXT
BACK TO HOME